macOS下51单片机的开发
可能是因为闲大了,也可能是因为以前一直想做却没做,现在终于可以做了!总之最近某宝淘了一块树莓派、一块STM32和一块STC89C52。今天从最低级的51板STC89开始鼓捣一下,这第一步,就是在mac上配置开发环境。
51单片机的大部分开发资源都是针对Windows的,我这块开发板的配套资料也一样,可是我实在是不想为它再另购一台电脑或者用Windows虚拟机。而且我也坚信,这不是我一个人的想法,所以还是求教Google啦。所幸,相关的资料虽然少,但好在还是有的。其实编辑器是不用担心的,主要就是编译器和下载工具。
编译器
Windows下有集成的开发环境Keil µVersion,芯片是宏晶的STC89C51RC,烧录软件和下载软件都可以从他的官网下载到。
对于macOS就没那么好运,首先要找到可用的编译器,好在找到了SDCC - Small Device C Compiler,它的安装也很简单,我用的Homebrew直接运行brew命令安装:
$ brew install sdcc
虽然有编译器,也都是c代码,但是语法上还是有那么一点点不同,根据文档以及网上的说法:
| Mac sdcc | Windows Keil c | |
|---|---|---|
| 头文件 | 8051.h/8052.h | reg51.h/reg52.h |
| IO端口 | P2_0 | P2^0 |
| IO口定义 | #define LED P2_0 | sbit LED = P2^0 |
| 中断函数 | void INT0_ISR() __interrupt 0 | void INT0_ISR() interrupt 0 |
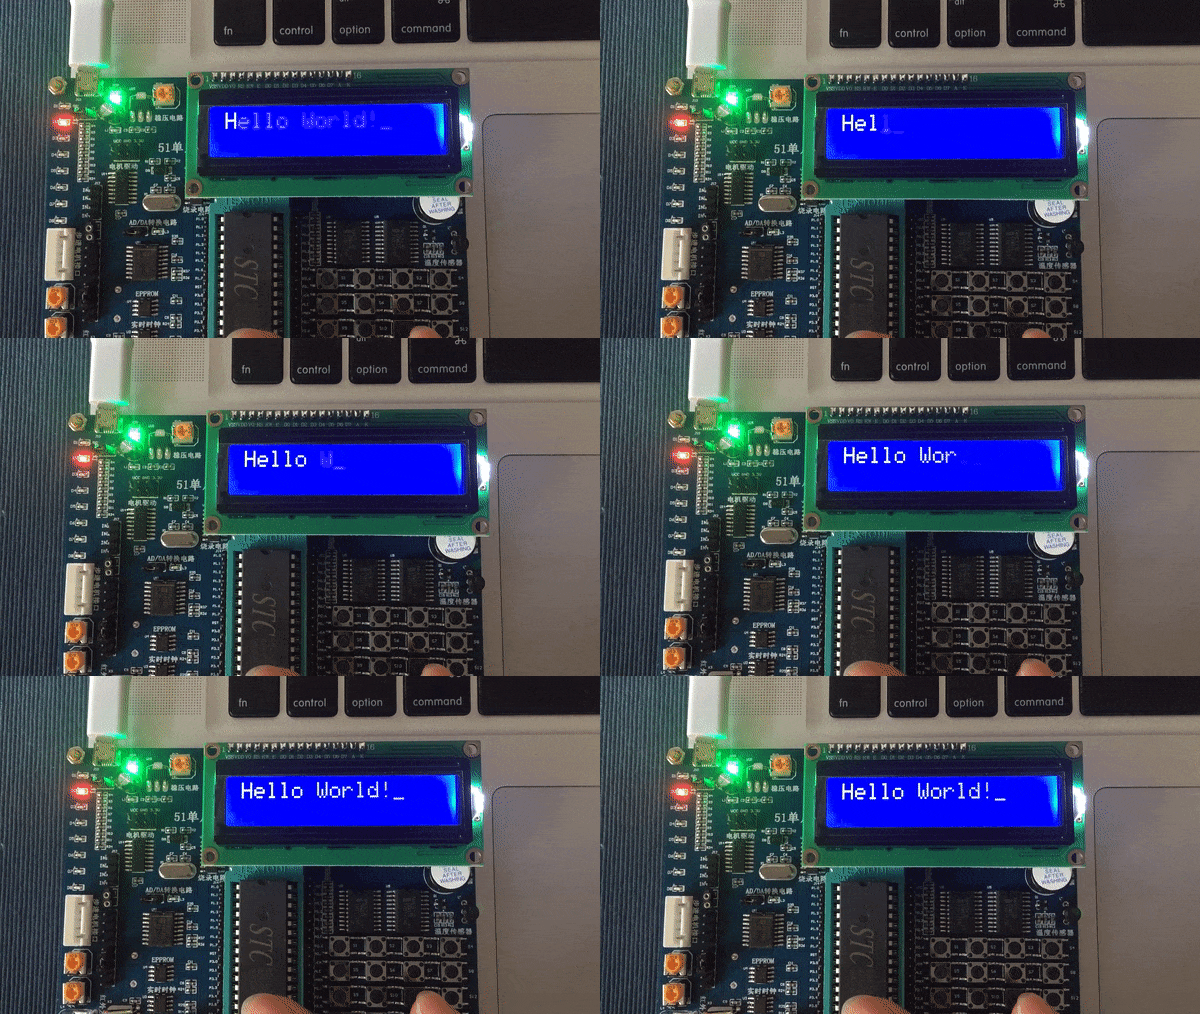
因为有配套设备中有个1602液晶屏,所以先来一个Hello World!吧,新建文件helloworld.c,代码如下:
#include<8052.h>

#define uchar unsigned char
#define uint unsigned int

#define lcden P2_5
#define lcdrs P1_0
#define rw P1_1
#define dula P2_6
#define wela P2_7

uchar table[] = "Hello World!";
uchar num;

void delay(uint z) {
    uint x, y;
    for(x = z; x > 0; x--)
        for(y = 110; y > 0; y--);
}

void write_com(uchar com) {
    lcdrs = 0;
    P0 = com;
    delay(5);
    lcden = 1;
    delay(5);
    lcden = 0;
}

void write_data(uchar date) {
    lcdrs = 1;
    P0 = date;
    delay(5);
    lcden = 1;
    delay(5);
    lcden = 0;
}

void init() {
    rw = 0;
    dula = 0;
    wela = 0;
    lcden = 0;
    write_com(0x38);
    write_com(0x0e);
    write_com(0x06);
    write_com(0x01);
    write_com(0x80);
}

void main() {
    init();
    for(num = 0; num < 12; num++) {
        write_data(table[num]);
        delay(100);
    }
    while(1);
}
然后编译:
$ sdcc helloword.c
成功执行后,生成了一堆文件,.asm、.ihx、.lk、.lst…,这里要下载到单片机ROM的只有.ihx文件。
下载工具
接下来是下载工具,我最先找到了stcflash,这是一个python脚本工具,首先安装依赖pySerial:
$ pip install pyserial
然后下载stcflash到本地,执行:
python stcflash.py
但是这个工具在我这里怎么都无法成功,而且用pyserial的list_ports()命令页列不出usb设备:
$python -m serial.tools.list_ports -v
/dev/cu.Bluetooth-Incoming-Port
    desc: n/a
    hwid: n/a
1 ports found
后来,考虑是不是USB驱动的问题?好在板上的CH340G芯片,WCH官方有提供mac的驱动下载。下载来安装并重启后,再list_ports():
$ python -m serial.tools.list_ports -v
/dev/cu.Bluetooth-Incoming-Port
    desc: n/a
    hwid: n/a
/dev/cu.wchusbserialfd130
    desc: USB2.0-Serial
    hwid: USB VID:PID=1A86:7523 LOCATION=253-1.3
2 ports found
好了,终于出来了,在用stcflash看一下设备信息:
$ python stcflash.py --protocol 89 --port /dev/cu.wchusbserialfd130
Connect to /dev/cu.wchusbserialfd130 at baudrate 2400
Detecting target...Traceback (most recent call last):
  File "stcflash.py", line 701, in <module>
    main()
  File "stcflash.py", line 697, in main
    program(Programmer(conn, opts.protocol), code, opts.erase_eeprom)
  File "stcflash.py", line 509, in program
    prog.detect()
  File "stcflash.py", line 243, in detect
    raise IOError()
OSError
额~ 依然不成功!
换了些参数继续尝试也未成功,于是乎继续Google,找到了stcgal,同样是python写的,安装stcgal以及依赖包tqdm:
$ pip install git+https://github.com/grigorig/stcgal.git
$ pip install tqdm
先来看下设备信息:
$ stcgal -P stc89 -p /dev/cu.wchusbserialfd130
Waiting for MCU, please cycle power: done
Target model:
  Name: STC89C52RC/LE52R
  Magic: F002
  Code flash: 8.0 KB
  EEPROM flash: 6.0 KB
Target frequency: 11.030 MHz
Target BSL version: 6.6C
Target options:
  cpu_6t_enabled=False
  bsl_pindetect_enabled=False
  eeprom_erase_enabled=False
  clock_gain=high
  ale_enabled=True
  xram_enabled=True
  watchdog_por_enabled=False
Disconnected!
OK了,注意在提示“Waiting for MCU, please cycle power:”的时候关掉电源再打开就可以了。
好啦,下载来试试烧录吧,就用上面生成的helloworld.ihx:
$ stcgal -P stc89 -p /dev/cu.wchusbserialfd130 helloworld.ihx
Waiting for MCU, please cycle power: done
Target model:
  Name: STC89C52RC/LE52R
  Magic: F002
  Code flash: 8.0 KB
  EEPROM flash: 6.0 KB
Target frequency: 11.030 MHz
Target BSL version: 6.6C
Target options:
  cpu_6t_enabled=False
  bsl_pindetect_enabled=False
  eeprom_erase_enabled=False
  clock_gain=high
  ale_enabled=True
  xram_enabled=True
  watchdog_por_enabled=False
Loading flash: 293 bytes (Intel HEX)
Switching to 19200 baud: checking setting testing done
Erasing 2 blocks: done
Writing flash: 640 Bytes [00:00, 1699.01 Bytes/s]
Setting options: done
Disconnected!
看下效果:
